Saturday, April 28, 2012

iPhone App Trouble-Shooter

This is the home screen.

As the app opens this image appears.  It asks "What's wrong?" and the user gets to choose the part that failed by clicking the buttons at the bottom.

If the shell button is pressed, this screen will appear which lists possible good and bad materials that the consumer might use to replace the shell. It ranked them in term of cost and how well they work.  If a choice is selected, the app will give more details about what that material looks like and where you could find it.

If the filling button is pressed the user will be directed towards this screen which does the same as the shell screen above.

And if the Bucket button is pressed the user will be directed towards this screen, which works as the 2 screen above it do.

-Megan

iPhone App


We learned about prototyping cell phones apps in class.  Cell phones apps in combination with the technology can enable more people to use a technology that they otherwise may not have the expertise to understand or work.  For our vacuum casting system, we wanted to design an app that would facilitate people to fix the system.  We wanted them to be able to take a broken vacuum cast and see what they could use to fix the broken components.  

-Annie

Monday, April 23, 2012

Directions

This is an image of potential directions for our project, it includes colored images and no words so non english speakers may understand. 
-Annie


Wednesday, April 11, 2012

Language of Design


For the Language of Design component of this project, we are utilizing color coordinating.  Parts that are put together are colored so that the edges match.  
The edges of the clamps are colored purple for easier assembly; the purple parts touch in final assembly.

Vacuum is colored many different colors to match other components.  The place where the powere plugs in and the cord are painted light blue, and the On button, and where it belongs in the assembly are painted pink.  The whole vacuum is painted with a blue line around it which matched the blue line on the bucket so that when assembled the correct side faces out.  There is a green top at the top so that the vacuum is also inserted in the correct orientation (not up-side down).

The vacuum correctly inserted into the bucket

-Megan

Prototype(4/11)

We got our vacuum!!  Its a vacuum used in food processing which used a simple mechanism.  We took it apart and moved components around to better fit our design.  We decided that the vacuum should be inserted into the side of the 5 gallon bucket, so all of the components that needed to be attached to 1 side.  We then created the attachment mechanism for the silicon shell on top of the bucket.  We took sheet metal and wrapped it around the top and clamped the 2 pieces together in a large ring that would tightly seal the silicon to the bucket.   It's displayed in the prototype not covering the entire bucket so that the inside of the bucket can be viewed and the vacuum components and particles can be viewed. The glass beads we ordered have not come in yet so coffee and polystyrene beads are the two particles displayed.
This shows the silicon shell stretched across the top of the bucket and the clamps around the rim holding it sealed in place(in real design silicon would completely cover but we left it open so the inside could be seen).

The clamp mechanism

Coffee and Polystyrene Beads as small particles inside shell

Vacuum inserted in the side of the 5 gallon bucket with all of the components(on/off switch, power and air release) facing outward
-Annie

Prototype (4/9)

Hi, we've been waiting on materials for our prototype and some finally came in (and the deadline approached) so we made our first prototype.  On Monday (4/9) we made molds for the shell of the vac-cast using the thermo former.  We ended up trying to combine two different thermoformed pieces to create the correct shape for the silicon.  We used the 2 types of silicon in the lab to create shells for our prototype.  The molds we created were not flat, so the silicon shells were not as uniformly distributed as we had hoped for.  In the silicon we saw in the Media Lab the forms were all made from smaller, flat pieces and then bend into the appropriate shapes.

Thermoformer

Ring made of sculpter's molding clay 

You can see the thermoformed plastic shell above

The 2 thermoformed pieces taped together

view from the top

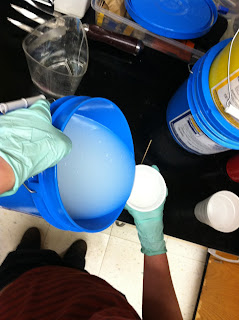
mixing the silicon

Silicon in aluminum tray

The thermoformed mold filled with silicon

We also thought about casing and decided that a case that was also where the case would be made would be optimal.  We used a 5 gallon bucket for the case and attached a bicycle value to it, which would allow vacuum to pull the air out and then it could seal the container.
-Megan