Saturday, August 4, 2012

Aris' Ideas

Aris, a prosthetic technician came to visit me in Managua and we tested out the vac-casting idea.  He experimented with me and gave me feedback in what he would like in a vacuum casting kit.  He liked the idea of using a vacuum to make a mold but  thought a bucket would work better than a plastic bag.  (he didn't like the plastic bag shells).  He also thought that the plastic bag was not flexible enough, so we got plastic garbage bags.  We tested out the plastic garbage bag, and bucket system with some coffee and it was too hard to insert a leg without modifying the shape of the stump.  To make the coffee soft (sauve) Aris wanted to blow air in.  We did this and the coffee blew up into our faces because the air wasn't distributed enough.  Aris and Alejandro went to buy sand to try with a heavier material, sand.   The sand was heavier, but the air still didn't loosen the sand enough to make it soft enough. We decided to try out the mold anyways, so Aris stuck his hand in the bucket and took the negative mold and then used the plaster to make the positive.  The hand turned out well and Aris didn't seem very concerned with the wrinkles.

Timing the plaster
Aris pouring the plaster

The molded hand
Anna with the hand
Pouring the plaster
the empty hole where his hand was
Close up of the hole
Aris hand in the hole
Another view of the hole
before the vacuum is turned on

Aris hand in the hole again

The empty bucket with the sand

Playing with the sand

trying to find the soft spot

more coffee makes it heavier, lets extend the bucket

Alejandro playing with the bucket

Making the bucket taller

-Annie


In Nicaragua


I'll  finish this post later but I wanted to get some pictures up quickly :)
Sorry it's been so long that I posted.  The last few days have been pretty hectic leading up to my Nicaragua trip.  I left yesterday morning and was able to spend most of the day at the hotel and then later at a lagoon and wandering a tourist city. The next day we spent a full day at the lab and  I was able to work on my prototypes.

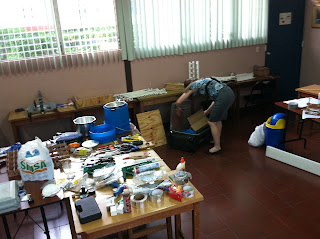
The lab/classroom space with lots of solar autoclave work going on.

Breakfast :)

Anna, Alejandro, me, Sam, and Charles at the lagoon

Unpacking my prototype

View of the lagoon

Lunch
(sorry for all the food pictures in with the Vacuum Casting project, but its really yummy)

-Annie


Plaster Adventure

     Aris Reyes came in to Managua to see my prototype and give me feed back. He is a prosthetics technician in Nicaragua who makes prosthetics for patients and then teaches them how to use them.  The first thing he did was say the the coffee may not be flexible enough and that blowing air in might help and we set up the vacuum to blow.  My prototype was not designed for that and one of the seams ripped.  It was okay though because Aris wanted to use a bucket instead of the bag. We went next door to Sinsa to get plaster, a bucket and a rubber band.  We got a garage bucket and gloves which we cut the elastic out of to make a rubber band, but we didn't get any plaster.  The fastest plaster they sold dried in 45 min, which Aris said was too long.  We then went to the market to pick up some plaster from someone Aris knew. 

     The guy who we meet turned out to make prosthetics himself in a shop in the market.  He had been making prosthetics for 30 years.  He started during the civivl war in the 80's when he would have 200 patients a month.  The guy said that he makes 2 prosthetics a week, each one costing $500.  70% of that cost he says is materials.  Materials include the plastic socket which is the hardest part to make because it need to be heated up to 350 degrees C.  He also said that most patients have to come back within the first week because it is uncomfortable.


Some foot braces in the shop


The special fast drying plaster (yesso)

Entering the workshop

Prosthetics maker and some of his work

The deal for the plaster

Plaster positive mold finished

Another view of a positive mold

Exercise equipment in the workshop

Plastic oven in the back room

More of the prosthetic maker's work

The entrance to the workshop/store

-Annie

Monday, July 30, 2012

One of the on-going problems in this project has been finding glue which can be used to attach the latex insert to the plastic space bags and create an air and water-tight seal. After  lots of experimentation using many different types of glue we decided to change our approach and instead look for a different material which, similar to latex, is strong yet elastic but, unlike latex, can be glued to plastic. Latex is used for gloves because of it's strength and elasticity both of which are important properties for gloves to have. For this reason we decided to look at other materials which are also used to make gloves. Luckily, we found some boxes of nitrile gloves in the lab which we tested using many different types of glue and found adhered to plastic with the help of Loctite Plastic Bonder. After further testing of this material it proved to be effective for this project and we proceeded to order a thicker and more durable sheet of nitrile to make new prototypes with.
-Ian

Wednesday, July 25, 2012

Full Size Prototype

The prototypes I have been working on so far have not been large enough to fit a human leg.  It was easier to work with smaller prototypes and less materials were wasted in trying ideas that failed.  Now that we have some functional smaller prototypes I thought I was time to make som large full scale models.  I bought a pair of pants and used hot glue and foam to give them the appearance of an amputated leg.  I used the pants and a visual to help understand how big the prototype needs to be and then to test the prototypes once they are complete. 
 
Jean leg inserted inside the full scale prototype

The full scale prototype without the leg inserted

This is a picture from the making of the prototype.  To make the double shell design, I cut out this shape from the the plastic bag.  I seal the edges and fold it in on itself.  This makes an easy open zipper at the bottom for easily filling and emptying the bag and makes the entire prototype a continuous piece.
-Annie

Monday, July 23, 2012

Going Back A Few Steps...


As Annie’s intern she gave me the opportunity to work with the original “AspiraMolde”. It all started with the Silicone which was probably the most tedious part of the project because, a lot of it was gluing pieces of silicone together and then waiting for it to dry. Then, the next step was taking the now cylindrical silicone and screwing/gluing it to the lid of the bucket. Annie had done this once (see FRIDAY, JUNE 15, 2012 The Lid) it wasn’t too hard. It required some strength and patience(what most of the project required). Next, I moved to the inside of the bucket. The vacuum pump was still attached to the bottom of the bucket. All I had to do was attach a nebulizer to the top of a baby bottle( to act as a hose), attach a plastic bag (to hold the coffee), and then wrap the end of the plastic bag around the bucket to keep it airtight and in place. Simple, huh?Once everything was in place and assembled we poured the coffee grinds into the plastic bag, put the lid on, and turned on the vacuum pump.

It wasn’t perfect,not at all a final prototype (wrinkles showed in the silicone and it wasn’t as solid as we wanted), but it represented the concept of what we wanted. We were able to see what it looked like and if Annie should continued with the approach. Was the concept valid?

As a highschool student it taught me a lot. Patience and how to never give giving into being discouraged, To always try again and again, and a bunch more.

-Caitlin

Thursday, July 19, 2012

What is AspiraMolde??

So I realized that it might be unclear what AspiraMolde is trying to accomplish.   AspiraMolde is a step in creating the socket which the prosthetic device will be connected to.  The socket is made from melting the plastic around a positive mold of the amputated leg, the stump.  A positive mold is made from the negative mold.  The AspiraMolde is a device that makes the negative mold using vacuum casting.

-Annie